1. UIVisualEffectView
iOS 8系统为我们提供了UIVisualEffectView。我们可以利用这个类来完成高斯模糊的效果。
@interface ViewController ()
@property (nonatomic, strong) UIView *boxView;
@property (nonatomic, strong) UIVisualEffectView *blurView;
@end
@implementation ViewController
- (void)viewDidLoad {
[super viewDidLoad];
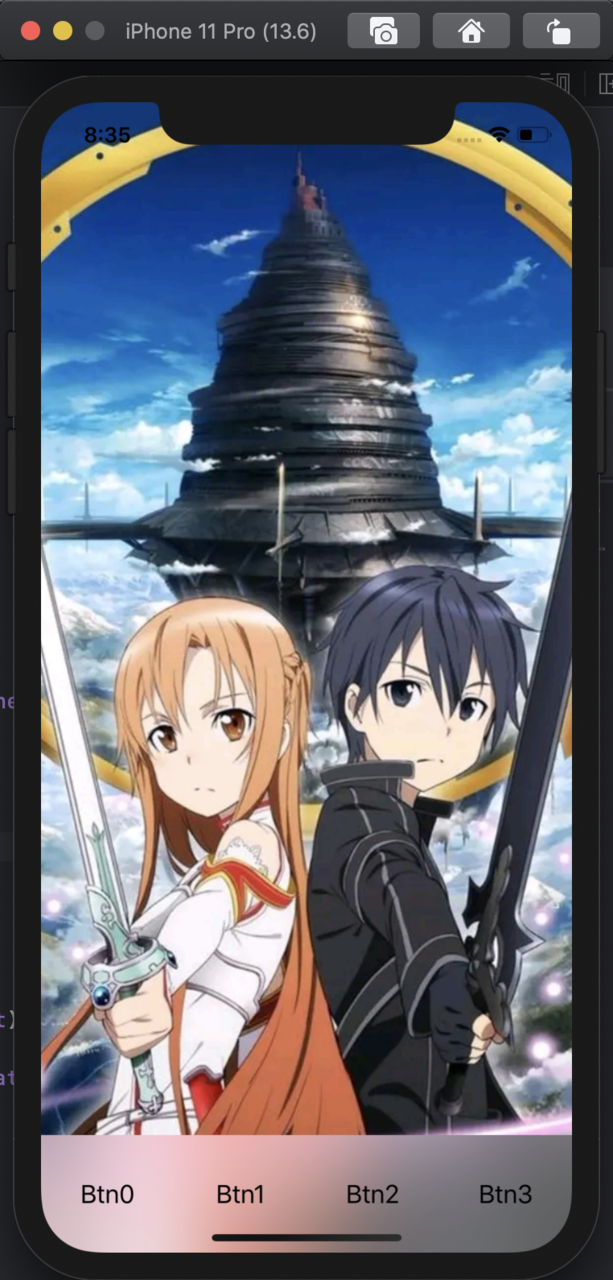
UIImageView *imageView = [[UIImageView alloc] initWithFrame:self.view.bounds];
imageView.contentMode = UIViewContentModeScaleAspectFill;
imageView.image = [UIImage imageNamed:@"sao"];
[self.view addSubview:imageView];
self.boxView = [[UIView alloc] initWithFrame:CGRectMake(0, self.view.bounds.size.height - 83.0, self.view.bounds.size.width, 83.0)];
[self.view addSubview:self.boxView];
UIBlurEffect *blurEffect = [UIBlurEffect effectWithStyle:UIBlurEffectStyleLight];
self.blurView = [[UIVisualEffectView alloc] initWithEffect:blurEffect];
self.blurView.frame = self.boxView.bounds;
[self.boxView addSubview:self.blurView];
CGFloat width = self.boxView.bounds.size.width / 4;
for (int i = 0; i < 4; i++) {
UIButton *button = [UIButton buttonWithType:UIButtonTypeCustom];
button.frame = CGRectMake(width * i, 0, width, self.boxView.bounds.size.height);
[button setTitleColor:UIColor.blackColor forState:UIControlStateNormal];
[button setTitle:[NSString stringWithFormat:@"Btn%d", i] forState:UIControlStateNormal];
[self.boxView addSubview:button];
}
}
复制代码2. snapshot的问题
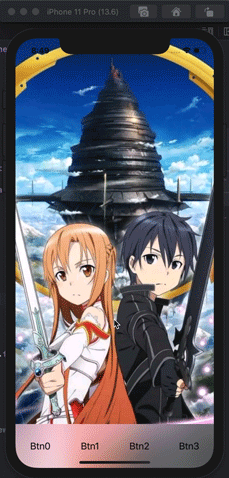
我们可能在做转场动画的时候需要对这个视图进行"截图",或者说可能利用的某个三方库的实现就是截图,那么我们会遇到一个bug。
在利用截图视图进行动画的时候,我们发现高斯模糊效果没有了,显示的是一个半透明的背景。

- (void)touchesBegan:(NSSet<UITouch *> *)touches withEvent:(UIEvent *)event
{
    [super touchesBegan:touches withEvent:event];
    // 截图
    UIView *snapView = [self.boxView snapshotViewAfterScreenUpdates:NO];
    snapView.frame = self.boxView.frame;
    [self.view addSubview:snapView];
    self.boxView.hidden = YES;
    [UIView animateWithDuration:0.8 animations:^{
        if (self.boxView.transform.ty > 0) {
            snapView.transform = CGAffineTransformMakeTranslation(0, -self.boxView.frame.size.height);
        } else {
            snapView.transform = CGAffineTransformMakeTranslation(0, self.boxView.frame.size.height);
        }
    } completion:^(BOOL finished) {
        if (self.boxView.transform.ty > 0) {
            self.boxView.transform = CGAffineTransformIdentity;
        } else {
            self.boxView.transform = CGAffineTransformMakeTranslation(0, self.boxView.frame.size.height);
        }
        self.boxView.hidden = NO;
        [snapView removeFromSuperview];
    }];
}
复制代码
这里的截图尝试了3种写法:
// 1
UIView *snapView = [self.boxView snapshotViewAfterScreenUpdates:NO];
// 2
UIView *snapView = [self.boxView snapshotViewAfterScreenUpdates:YES];
// 3
@implementation UIView (Snapshot)
- (UIImageView *)yc_snapshotImageView
{
    UIImage *image;
    UIGraphicsBeginImageContextWithOptions(self.bounds.size, NO, 0);
    CGContextRef context = UIGraphicsGetCurrentContext();
    if (context) {
        [self.layer renderInContext:context];
        image = UIGraphicsGetImageFromCurrentImageContext();
    }
    UIGraphicsEndImageContext();
    if (image) {
        return [[UIImageView alloc] initWithImage:image];
    }
    return nil;
}
@end
UIImageView *snapView = [self.boxView yc_snapshotImageView];
复制代码
尝试之后发现均不能解决这个“透明”问题。但是如果我们直接用高斯模糊视图进行动画,发现是有效果的。
- (void)touchesBegan:(NSSet<UITouch *> *)touches withEvent:(UIEvent *)event
{
    [super touchesBegan:touches withEvent:event];
    // 不使用截图
    [UIView animateWithDuration:0.8 animations:^{
        if (self.boxView.transform.ty > 0) {
            self.boxView.transform = CGAffineTransformIdentity;
        } else {
            self.boxView.transform = CGAffineTransformMakeTranslation(0, self.boxView.frame.size.height);
        }
    }];
}
复制代码
下面我们来思考一下,为什么截图不行呢?
-
高斯模糊的效果是怎么来的?
我们可以看到,高斯模糊的效果其实是对后面图像的一个“滤镜”效果。也就是说,如果背后没有图像,那么高斯模糊是没有效果的。
-
截图时发生了什么?
截图的时候,我们是直接获取视图图像的。无论是使用 snapshotViewAfterScreenUpdates: 还是利用 renderInContext:,其实都 只能拿到该视图的图像,无法获取它和后面图层的混合效果 。所以最后只获到一个半透明的白色,这个是由
UIBlurEffectStyleLight提供的一个半透明的图像。
3. 解决snapshot的效果问题
现在底层的实现为 UIView *snapView = [self.boxView yc_snapshotImageView]; ,如何解决存在半透明视图的问题呢?
我们知道 使用高斯模糊视图做动画是没问题的 ,那我们的思路可以是先隐藏原有的高斯模糊视图,然后进行截图,最后在它的下面添加一个实际的用高斯模糊视图。
- (void)touchesBegan:(NSSet<UITouch *> *)touches withEvent:(UIEvent *)event
{
    [super touchesBegan:touches withEvent:event];
    // 容器
    UIView *snapBoxView = [[UIView alloc] initWithFrame:self.boxView.frame];
    [self.view addSubview:snapBoxView];
    // 实际高斯模糊视图
    UIBlurEffect *blurEffect = [UIBlurEffect effectWithStyle:UIBlurEffectStyleLight];
    UIVisualEffectView *blurView = [[UIVisualEffectView alloc] initWithEffect:blurEffect];
    blurView.frame = snapBoxView.bounds;
    [snapBoxView addSubview:blurView];
    // 只渲染非高斯模糊部分的视图
    self.blurView.hidden = YES;
    UIImageView *snapView = [self.boxView yc_snapshotImageView];
    self.blurView.hidden = NO;
    [snapBoxView addSubview:snapView];
    // 动画
    self.boxView.hidden = YES;
    [UIView animateWithDuration:0.8 animations:^{
        if (self.boxView.transform.ty > 0) {
            snapBoxView.transform = CGAffineTransformMakeTranslation(0, -self.boxView.frame.size.height);
        } else {
            snapBoxView.transform = CGAffineTransformMakeTranslation(0, self.boxView.frame.size.height);
        }
    } completion:^(BOOL finished) {
        if (self.boxView.transform.ty > 0) {
            self.boxView.transform = CGAffineTransformIdentity;
        } else {
            self.boxView.transform = CGAffineTransformMakeTranslation(0, self.boxView.frame.size.height);
        }
        self.boxView.hidden = NO;
        [snapBoxView removeFromSuperview];
    }];
}
复制代码
4. Category
在实际情况中,我们的视图可能被封装了起来,像下面这样:
@interface BottomView : UIView
@property (nonatomic, strong) UIVisualEffectView *blurView;
@end
@implementation BottomView
- (instancetype)initWithFrame:(CGRect)frame
{
self = [super initWithFrame:frame];
if (self) {
self.blurView = [self innerBlurView];
[self addSubview:self.blurView];
CGFloat width = self.bounds.size.width / 4;
for (int i = 0; i < 4; i++) {
UIButton *button = [UIButton buttonWithType:UIButtonTypeCustom];
button.frame = CGRectMake(width * i, 0, width, self.bounds.size.height);
[button setTitleColor:UIColor.blackColor forState:UIControlStateNormal];
[button setTitle:[NSString stringWithFormat:@"Btn%d", i] forState:UIControlStateNormal];
[self addSubview:button];
}
}
return self;
}
- (UIVisualEffectView *)innerBlurView
{
UIBlurEffect *blurEffect = [UIBlurEffect effectWithStyle:UIBlurEffectStyleLight];
UIVisualEffectView *blurView = [[UIVisualEffectView alloc] initWithEffect:blurEffect];
blurView.frame = self.bounds;
return blurView;
}
@end
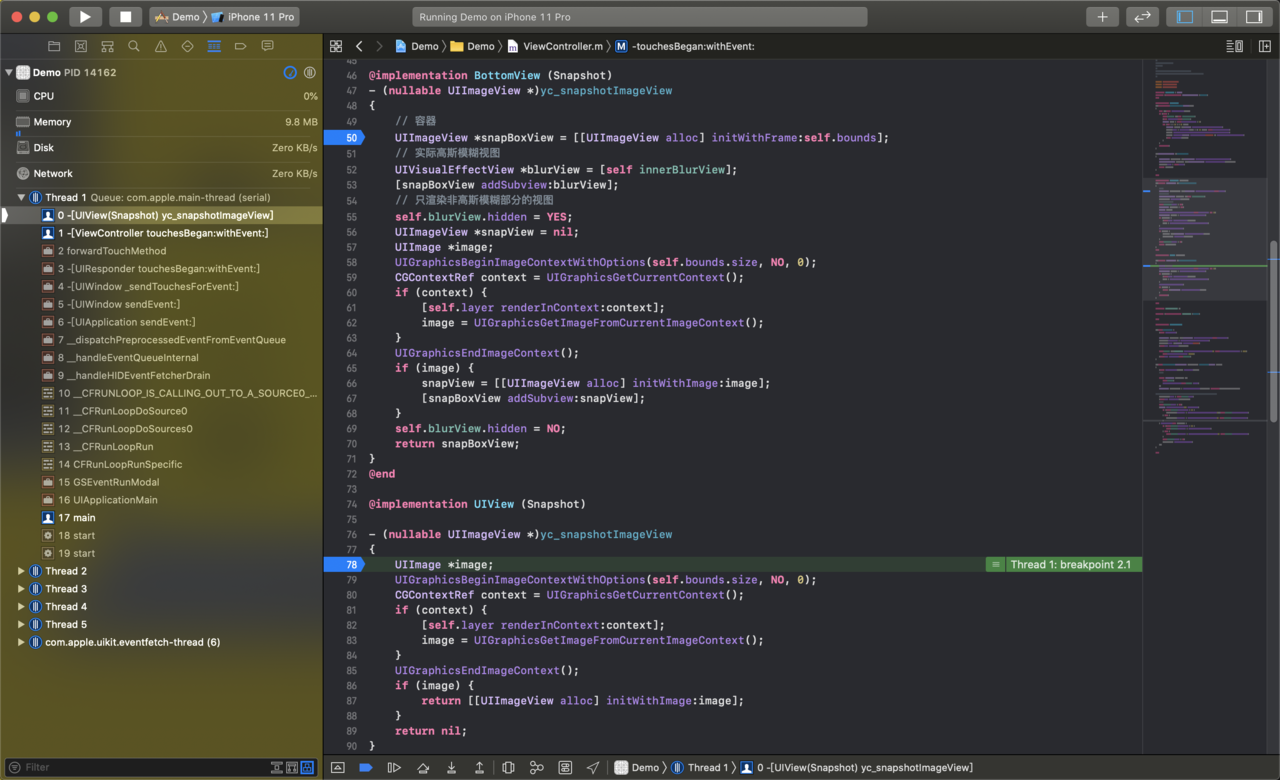
@implementation BottomView (Snapshot)
- (nullable UIImageView *)yc_snapshotImageView
{
// 容器
UIImageView *snapBoxView = [[UIImageView alloc] initWithFrame:self.bounds];
// 实际高斯模糊视图
UIVisualEffectView *blurView = [self innerBlurView];
[snapBoxView addSubview:blurView];
// 只渲染非高斯模糊部分的视图
self.blurView.hidden = YES;
UIImageView *snapView = nil;
UIImage *image;
UIGraphicsBeginImageContextWithOptions(self.bounds.size, NO, 0);
CGContextRef context = UIGraphicsGetCurrentContext();
if (context) {
[self.layer renderInContext:context];
image = UIGraphicsGetImageFromCurrentImageContext();
}
UIGraphicsEndImageContext();
if (image) {
snapView = [[UIImageView alloc] initWithImage:image];
[snapBoxView addSubview:snapView];
}
self.blurView.hidden = NO;
return snapBoxView;
}
@end
复制代码4.1 考点问题
那么现在问题来了:
@implementation UIView (Snapshot)
- (nullable UIImageView *)yc_snapshotImageView
{
    ...
}
@end

@implementation BottomView (Snapshot)
- (nullable UIImageView *)yc_snapshotImageView
{
    ...
}
@end
复制代码
我们有两个Category,均实现了同一个方法,那么执行哪一个呢?
4.2 底层实现
这里不带大家挨着走dyld的加载流程了,我们只说重点部分attachCategories 和 attachLists 函数:
static void
attachCategories(Class cls, const locstamped_category_t *cats_list, uint32_t cats_count,
                 int flags)
{
    if (slowpath(PrintReplacedMethods)) {
        printReplacements(cls, cats_list, cats_count);
    }
    if (slowpath(PrintConnecting)) {
        _objc_inform("CLASS: attaching %d categories to%s class '%s'%s",
                     cats_count, (flags & ATTACH_EXISTING) ? " existing" : "",
                     cls->nameForLogging(), (flags & ATTACH_METACLASS) ? " (meta)" : "");
    }

    constexpr uint32_t ATTACH_BUFSIZ = 64;
    method_list_t   *mlists[ATTACH_BUFSIZ];
    property_list_t *proplists[ATTACH_BUFSIZ];
    protocol_list_t *protolists[ATTACH_BUFSIZ];

    uint32_t mcount = 0;
    uint32_t propcount = 0;
    uint32_t protocount = 0;
    bool fromBundle = NO;
    bool isMeta = (flags & ATTACH_METACLASS);
    auto rw = cls->data();

    // 遍历分类
    for (uint32_t i = 0; i < cats_count; i++) {
        auto& entry = cats_list[i];
        // 获取每个分类的方法
        method_list_t *mlist = entry.cat->methodsForMeta(isMeta);
        if (mlist) {
            if (mcount == ATTACH_BUFSIZ) {
                prepareMethodLists(cls, mlists, mcount, NO, fromBundle);
                rw->methods.attachLists(mlists, mcount);
                mcount = 0;
            }
            mlists[ATTACH_BUFSIZ - ++mcount] = mlist;
            fromBundle |= entry.hi->isBundle();
        }
        // 获取每个分类的属性
        property_list_t *proplist =
            entry.cat->propertiesForMeta(isMeta, entry.hi);
        if (proplist) {
            if (propcount == ATTACH_BUFSIZ) {
                rw->properties.attachLists(proplists, propcount);
                propcount = 0;
            }
            proplists[ATTACH_BUFSIZ - ++propcount] = proplist;
        }
        // 获取每个分类的协议
        protocol_list_t *protolist = entry.cat->protocolsForMeta(isMeta);
        if (protolist) {
            if (protocount == ATTACH_BUFSIZ) {
                rw->protocols.attachLists(protolists, protocount);
                protocount = 0;
            }
            protolists[ATTACH_BUFSIZ - ++protocount] = protolist;
        }
    }

    // 遍历完还有方法、属性、分类,再扫个尾
    if (mcount > 0) {
        prepareMethodLists(cls, mlists + ATTACH_BUFSIZ - mcount, mcount, NO, fromBundle);
        rw->methods.attachLists(mlists + ATTACH_BUFSIZ - mcount, mcount);
        if (flags & ATTACH_EXISTING) flushCaches(cls);
    }

    rw->properties.attachLists(proplists + ATTACH_BUFSIZ - propcount, propcount);

    rw->protocols.attachLists(protolists + ATTACH_BUFSIZ - protocount, protocount);
}

void attachLists(List* const * addedLists, uint32_t addedCount) {
    if (addedCount == 0) return;

    if (hasArray()) {
        // many lists -> many lists
        // 要扩充多列表
        uint32_t oldCount = array()->count;
        uint32_t newCount = oldCount + addedCount;
        // 重新分配内存空间
        setArray((array_t *)realloc(array(), array_t::byteSize(newCount)));
        // 更新总数
        array()->count = newCount;
        // 把老的列表放在后移,放在addedCount之后
        memmove(array()->lists + addedCount, array()->lists,
                oldCount * sizeof(array()->lists[0]));
        // 新列表放在头部
        memcpy(array()->lists, addedLists,
               addedCount * sizeof(array()->lists[0]));
    }
    else if (!list  &&  addedCount == 1) {
        // 0 lists -> 1 list
        // 只有一个列表直接赋值
        list = addedLists[0];
    }
    else {
        // 1 list -> many lists
        // 只有1个列表,要扩充为多列表
        List* oldList = list;
        uint32_t oldCount = oldList ? 1 : 0;
        uint32_t newCount = oldCount + addedCount;
        // 分配内存空间
        setArray((array_t *)malloc(array_t::byteSize(newCount)));
        // 更新总数
        array()->count = newCount;
        // 老列表接在尾部
        if (oldList) array()->lists[addedCount] = oldList;
        // 新列表放在头部
        memcpy(array()->lists, addedLists,
               addedCount * sizeof(array()->lists[0]));
    }
}
复制代码
从上面的代码我们可以看出:
-
分类在加载方法的时候,分类的方法是放在方法列表的头部的。
-
同一个类的方法,根据编译顺序,越后面的的方法放在方法列表的越前面。
4.3 回到问题
@implementation UIView (Snapshot)
- (nullable UIImageView *)yc_snapshotImageView
{
    ...
}
@end

@implementation BottomView (Snapshot)
- (nullable UIImageView *)yc_snapshotImageView
{
    ...
}
@end
复制代码对于不同继承类的同一个Category方法,这两个方法是分别在UIView和BottomView的类对象中的。
- 不存在先后顺序问题。
- 不同的先后编译顺序,不影响最终的响应方法。
- 在实际消息发送方法的查找过程中,实例对象先查找自身类的方法列表,如果没有才会向上在父类进行方法列表的查找。
BottomView会在查找自己类的方法列表时找到 yc_snapshotImageView 方法,用自己的实现而非父类的实现。
下面我们验证一下:
- (void)touchesBegan:(NSSet<UITouch *> *)touches withEvent:(UIEvent *)event
{
    [super touchesBegan:touches withEvent:event];
    // 容器
    UIImageView *snapBoxView = [self.boxView yc_snapshotImageView];
    snapBoxView.frame = self.boxView.frame;
    [self.view addSubview:snapBoxView];
    // 动画
    self.boxView.hidden = YES;
    [UIView animateWithDuration:0.8 animations:^{
        if (self.boxView.transform.ty > 0) {
            snapBoxView.transform = CGAffineTransformMakeTranslation(0, -self.boxView.frame.size.height);
        } else {
            snapBoxView.transform = CGAffineTransformMakeTranslation(0, self.boxView.frame.size.height);
        }
    } completion:^(BOOL finished) {
        if (self.boxView.transform.ty > 0) {
            self.boxView.transform = CGAffineTransformIdentity;
        } else {
            self.boxView.transform = CGAffineTransformMakeTranslation(0, self.boxView.frame.size.height);
        }
        self.boxView.hidden = NO;
        [snapBoxView removeFromSuperview];
    }];
}
复制代码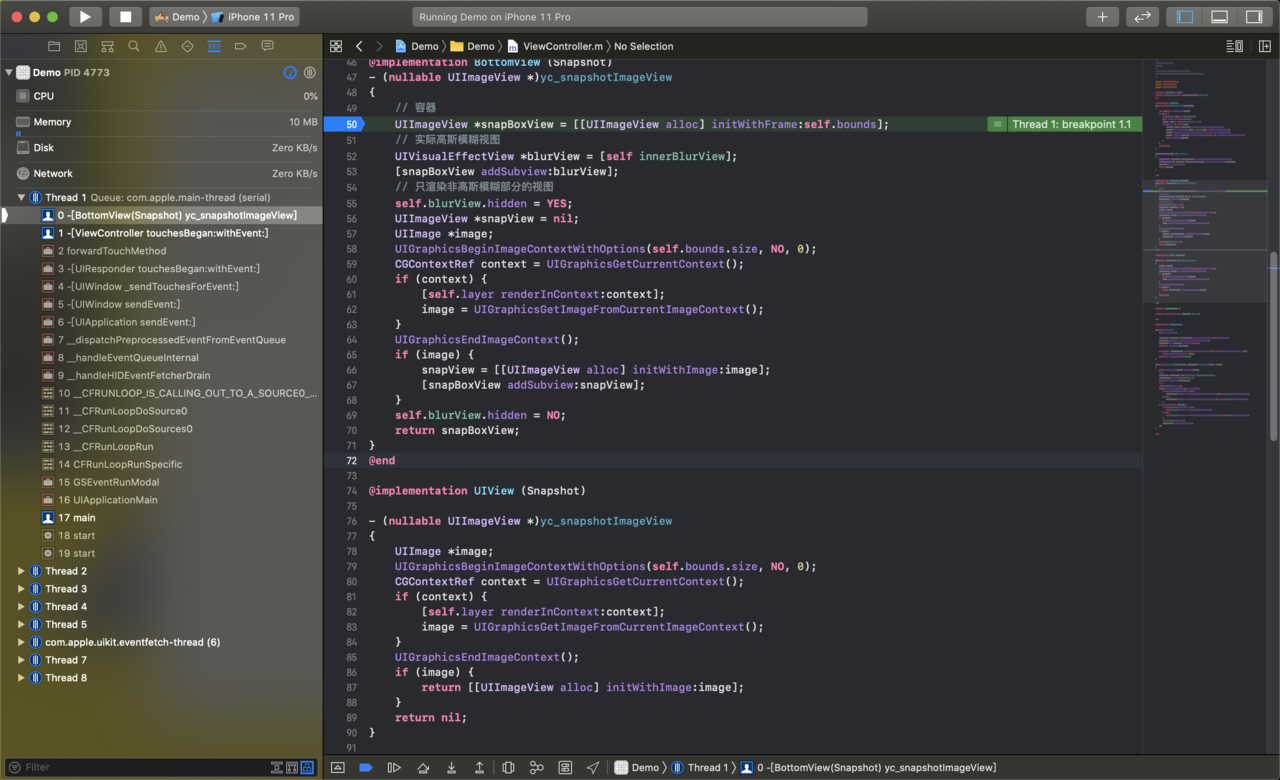
我们再试试直接调用父类的 yc_snapshotImageView 方法。
- (void)touchesBegan:(NSSet<UITouch *> *)touches withEvent:(UIEvent *)event
{
    [super touchesBegan:touches withEvent:event];
    // 容器
    struct objc_super superClass = {
        self.boxView,
        class_getSuperclass([self.boxView class])
    };
    UIImageView *snapBoxView = objc_msgSendSuper(&superClass, @selector(yc_snapshotImageView));
    snapBoxView.frame = self.boxView.frame;
    [self.view addSubview:snapBoxView];
    // 动画
    self.boxView.hidden = YES;
    [UIView animateWithDuration:0.8 animations:^{
        if (self.boxView.transform.ty > 0) {
            snapBoxView.transform = CGAffineTransformMakeTranslation(0, -self.boxView.frame.size.height);
        } else {
            snapBoxView.transform = CGAffineTransformMakeTranslation(0, self.boxView.frame.size.height);
        }
    } completion:^(BOOL finished) {
        if (self.boxView.transform.ty > 0) {
            self.boxView.transform = CGAffineTransformIdentity;
        } else {
            self.boxView.transform = CGAffineTransformMakeTranslation(0, self.boxView.frame.size.height);
        }
        self.boxView.hidden = NO;
        [snapBoxView removeFromSuperview];
    }];
}
复制代码
重要
使用objc_msgSendSuper时,可能编译器会报错:
Too many arguments to function call, expected 0, have 3
解决办法:在Build Setting修改Enable Strict Checking of objc_msgSend Calls为No。
通过实际的运行结果也验证了我们的理论。
如果觉得本文对你有所帮助,给我点个赞吧~

相关文章
- 【WWDC20】10646 - What's new in Web Inspector
- python selenium ElementClickInterceptedException
- Flutter 股票 分时线、K线
- 浅尝 GraphQL 与 NestJS 的完美结合
- Xtrabackup实现数据的备份与恢复
- Swift 5.x - 类型转换(中文文档)
- iOS libffi详解(1)- 使用方法
- SwiftUI之View Tree 实战2(绘制二叉树)