使用 UICollectionView 做钱包布局界面,自然是自定制布局,使用 UICollectionViewLayout 的子类
我们平常一般使用 UICollectionViewFlowLayout
指定大小 size, 间距 spacing, 每一个格子的位置 frame 就出来了
从顶部到底部,格子一个一个码下来
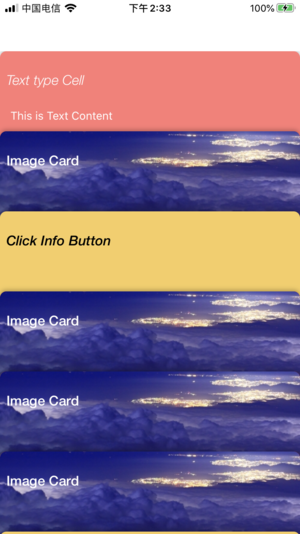
如图,做钱包布局,需要自定制布局 custom layout
自定制布局 custom layout,就是手动指定每一个格子的位置 frame
把格子放在我们想要的位置上,即手动指定他的 frame
自定制布局很简单,三步走:
* override public func prepare(), 重写准备方法
一般可以在这,把所有格子视图的 frame 算出来
frame 怎么传递给对应的格子呢?
需创建对应的 UICollectionViewLayoutAttributes,
往往会有一些信息要记录,状态要保留,就使用 UICollectionViewLayoutAttributes 的子类。好来添加属性
* override public func layoutAttributesForItem(at indexPath: IndexPath) -> UICollectionViewLayoutAttributes?, 重写单个格子 item 的布局方法
把上一步准备好的 UICollectionViewLayoutAttributes 子类,提供过去,供 UICollectionView 的管理引擎使用
* override public func layoutAttributesForElements(in rect: CGRect) -> [UICollectionViewLayoutAttributes]?, 重写格子视图 UICollection 的布局方法
在这一般需要提供格子 item 、补充视图 supplementary view 和装饰视图 decoration view 的布局信息,
本例子只涉及格子 item 的布局, 把上一步准备好的 UICollectionViewLayoutAttributes 子类,提交给 UICollectionView 的管理引擎使用
钱包布局的关键点:
这个布局有两个状态,
* 初始状态,前面的卡片层层叠叠,最后一张完全展示
没有卡片被选中的状态相当于初始状态
该状态的布局信息,计算简单,
指定第一张卡片的位置 frame, 余下卡片的位置,就都确定了
就是纵坐标有变化,y: titleHeight * CGFloat(index)
 fileprivate func setNoSelect(attribute:CardLayoutAttributes) {
        guard let collection = collectionView else {
            return
        }
        let noneIdx = Int(collection.contentOffset.y/titleHeight)
        if noneIdx < 0 {
            return
        }
        attribute.isExpand = false
        let index = attribute.zIndex
        var currentFrame = CGRect(x: collection.frame.origin.x, y: titleHeight * CGFloat(index), width: cellSize.width, height: cellSize.height)
        if index == noneIdx{
            attribute.frame = CGRect(x: currentFrame.origin.x, y: collection.contentOffset.y, width: cellSize.width, height: cellSize.height)
        }
        else if index <= noneIdx, currentFrame.maxY > collection.contentOffset.y{
            currentFrame.origin.y -= (currentFrame.maxY - collection.contentOffset.y )
            attribute.frame = currentFrame
        }
        else {
            attribute.frame = currentFrame
        }
    }
复制代码
这里使用了 UICollectionViewLayoutAttributes 的子类,
添加了一个卡片是否展开的属性 isExpand
本例子中的 item , 添加了一个平移手势,isExpand 用于手势的交互
class CardLayoutAttributes: UICollectionViewLayoutAttributes {
    var isExpand = false

    override func copy(with zone: NSZone? = nil) -> Any {
        let attribute = super.copy(with: zone) as! CardLayoutAttributes
        attribute.isExpand = isExpand
        return attribute
    }
}
复制代码
* 选中状态,选中的卡片展开,其余的卡片层层叠叠,最后一张状态不变
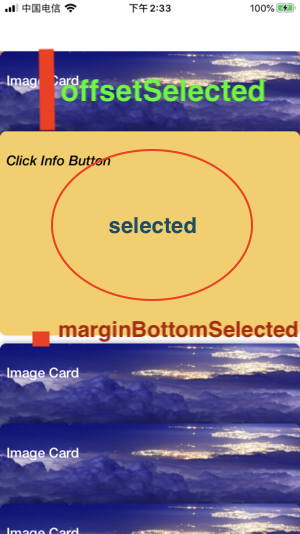
这里使用的计算方式是,把选中的卡片放在中间固定的位置,即确定了选中卡片的 y 坐标为 collection.contentOffset.y + offsetSelected
这等于选中的编号 selectedIdx 的位置 frame, 确定了
中间的位置确定,然后计算两边
一边从 selectedIdx - 1 到 0, 另一边从 selectedIdx + 1 到结尾,算出每一个格子对应的 y 坐标,就确定了其 frame
fileprivate func calculate(for attributes: [CardLayoutAttributes],  choose selectedIP: IndexPath) -> [CGRect]{

        guard let collection = collectionView else {
            return []
        }
        let noneIdx = Int(collection.contentOffset.y / titleHeight)
        if noneIdx < 0 {
            return []
        }
        let x = collection.frame.origin.x

        var selectedIdx = 0
        for attr in attributes{
            if attr.indexPath == selectedIP{
                break
            }
            selectedIdx += 1
        }

        var frames = [CGRect](repeating: .zero, count: attributes.count)

        // Edit here
        let offsetSelected: CGFloat = 100
        let marginBottomSelected: CGFloat = 10
        frames[selectedIdx] = CGRect(x: x, y: collection.contentOffset.y + offsetSelected, width: cellSize.width, height: cellSize.height)
        if selectedIdx > 0{
            for i in 0...(selectedIdx-1){
                frames[selectedIdx - i - 1] = CGRect(x: x, y: frames[selectedIdx].origin.y - titleHeight * CGFloat(i + 1), width: cellSize.width, height: cellSize.height)
            }
        }
        if selectedIdx < (attributes.count - 1){
            for i in (selectedIdx + 1)...(attributes.count - 1){
                frames[i] = CGRect(x: x, y: frames[selectedIdx].origin.y + marginBottomSelected + titleHeight * CGFloat(i - selectedIdx - 1) + cellSize.height, width: cellSize.width, height: cellSize.height)
            }
        }


        return frames

    }
复制代码
* 选中了一个格子,就要刷新 UICollecionView 的自定制布局
调用 invalidateLayout() ,就会把前面三个方法,从 prepare() 开始, 再走一遍
   fileprivate var _selectPath: IndexPath? {
        didSet {
            self.collectionView!.isScrollEnabled = (_selectPath == nil)
        }
    }


    public var selectPath: IndexPath? {
        set {
            _selectPath = (_selectPath == newValue) ? nil : newValue
            self.collectionView?.performBatchUpdates({
                self.invalidateLayout()
            }, completion: nil)
        } get {
            return _selectPath
        }
    }
复制代码
最后:
UICollectionView 的格子层层叠叠,下面的码在上层的上方,通过 layer.zPosition 来保证